Willie Nelson Polymer Photogravure commission Pt. 2
This is a followup to my first post covering the process of making a polymer photogravure plate. This post covers the steps to making a print.
As mentioned in the previous post I was commissioned to create a polymer photogravure plate of a photo by Peter Leighton for Flatbed Press. The photo is an amazing piece of history, Willie Nelson playing at the Texas Chili Fest in Terlingua, TX in 1973.
The above video is a general overview of making the print.
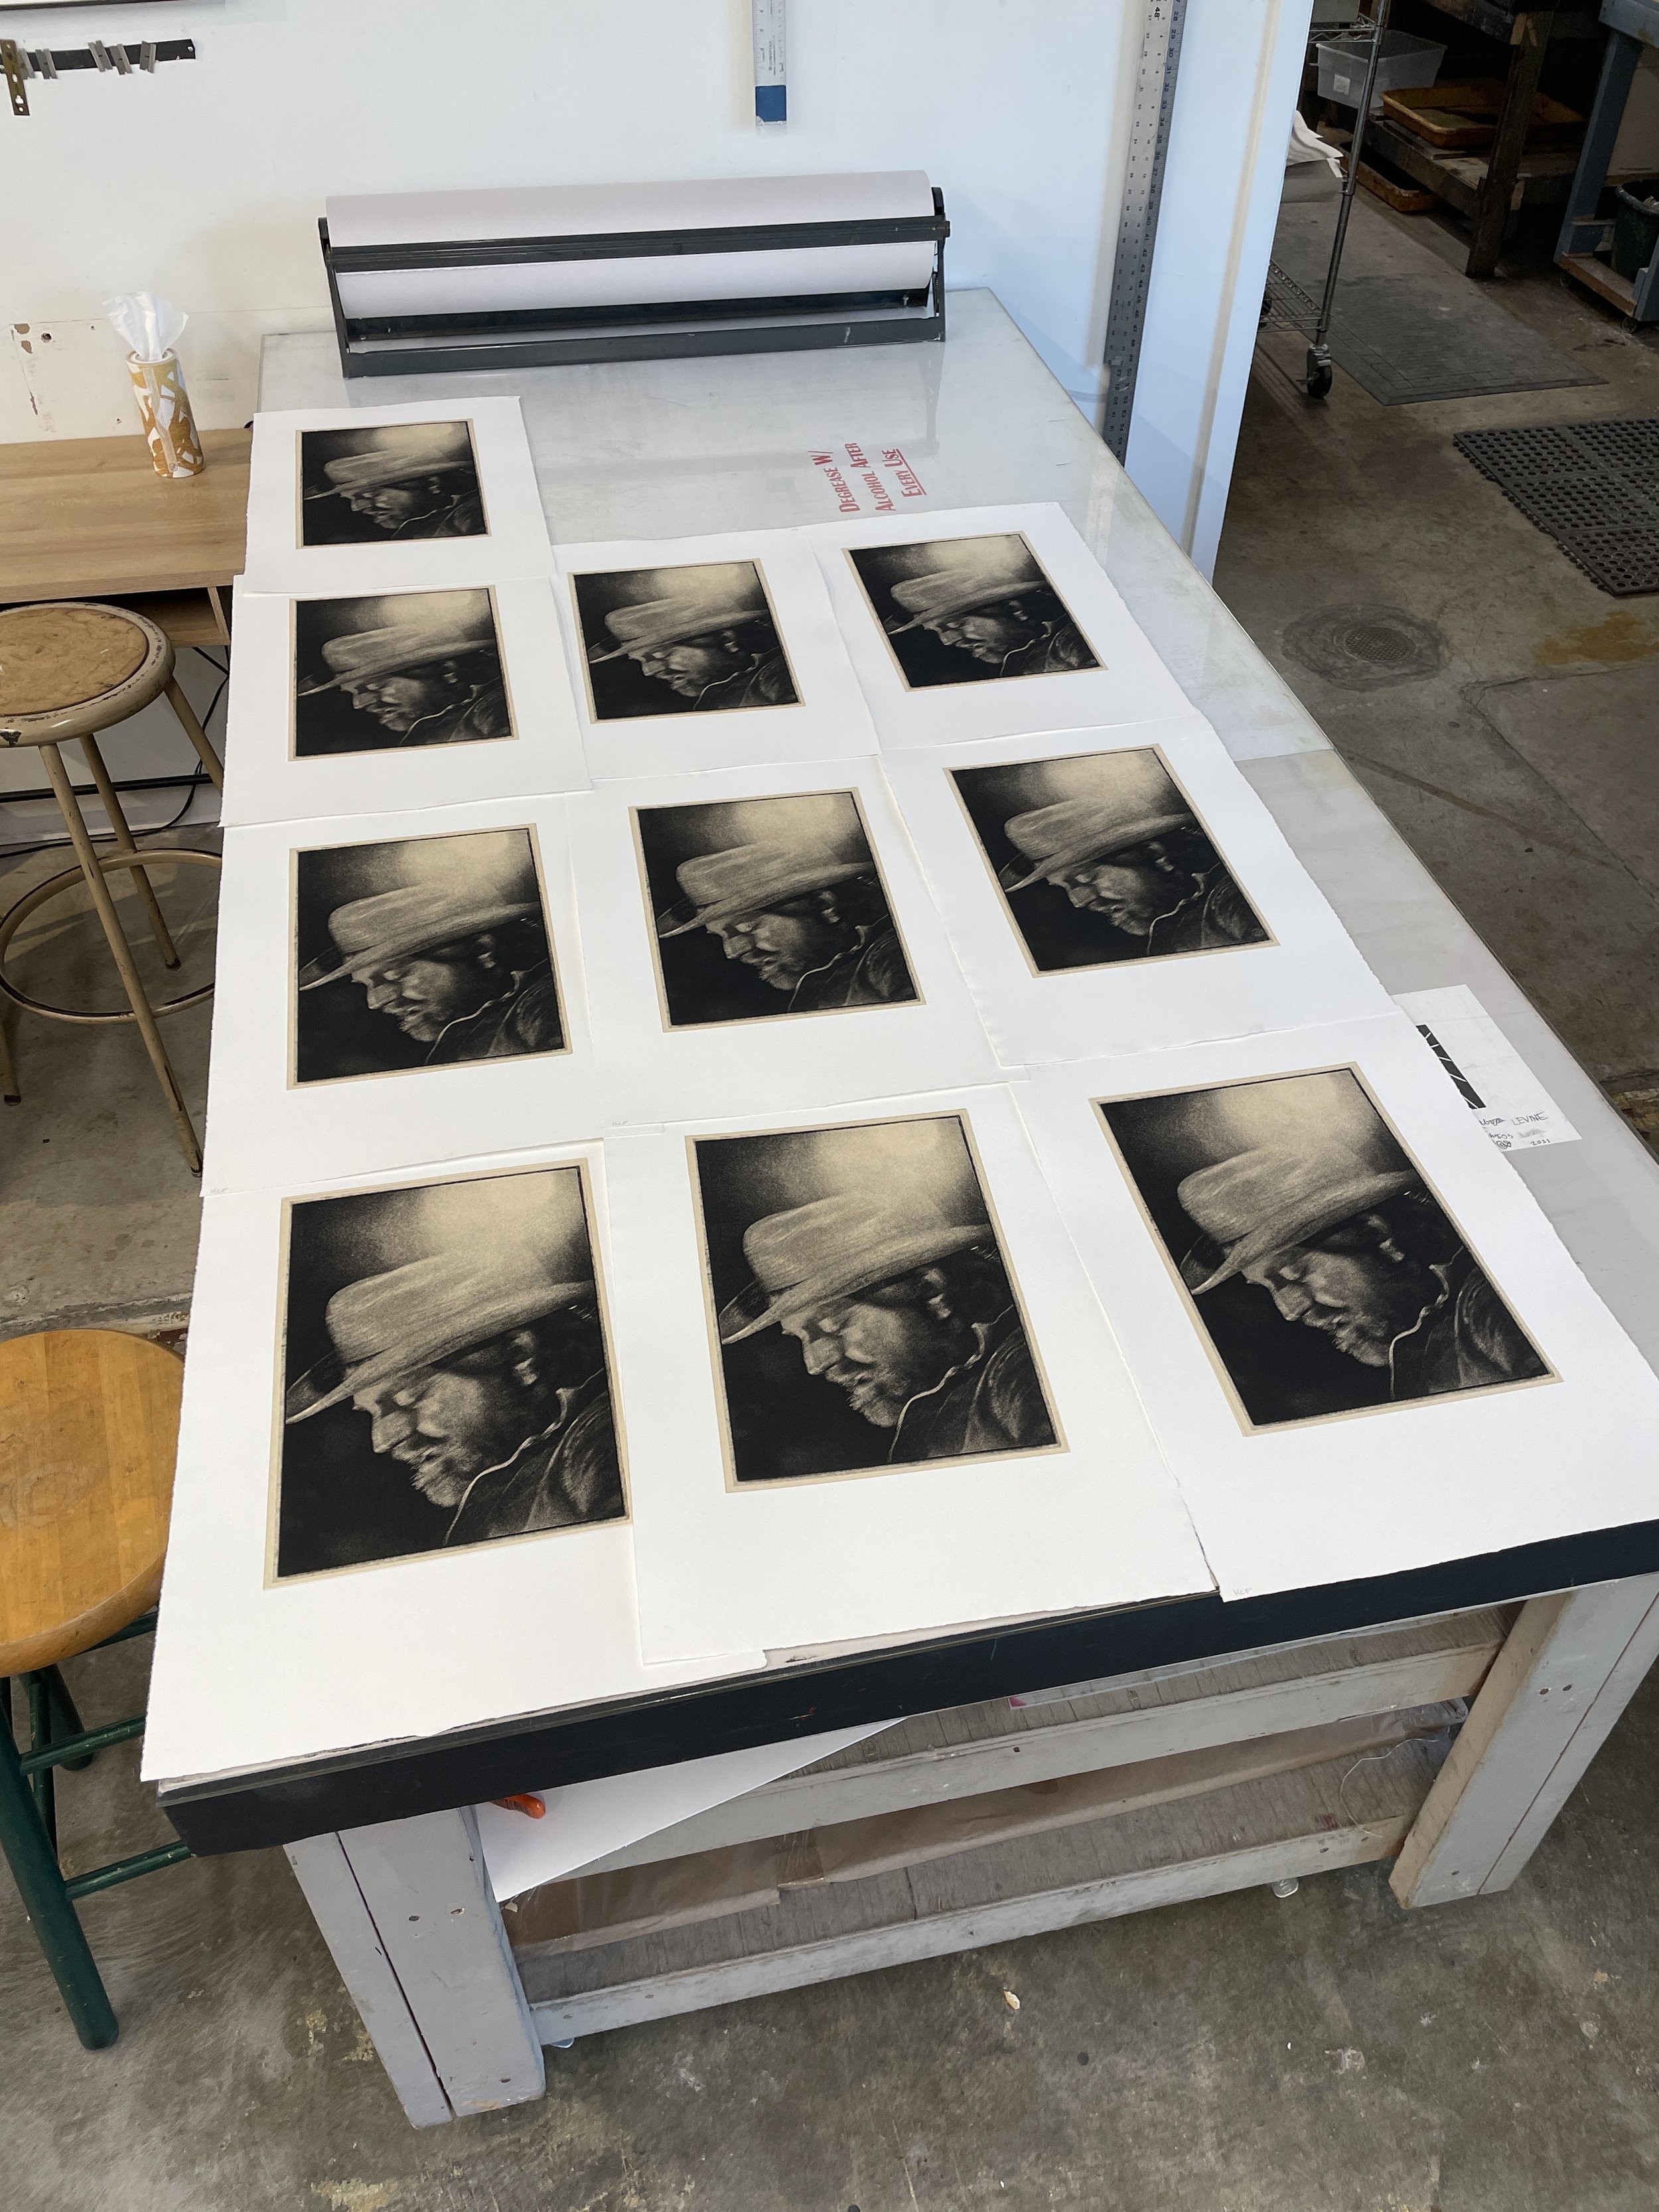
This print is a roughly 11x16 plate printed chine collé using natural Kitakata on 15x22 Hahnemühle Copperplate paper (a favorite of mine). The plate is printed with a mixture of Charbonnel Soft Black and 55981 etching inks. We decided on an edition of 20. 10 going to Flatbed and 10 going to Peter Leighton. In addition we printed 3 APs (artist’s proofs), 3 for Flatbed archives, then the BAT (bon à tirer - french for “ready to print”). The BAT is signed off on by Peter when we did our proofing day. We did a number of variation prints on our proofing day with different ink/tissue combos. This BAT is what I use as a basis for pulling all the subsequent prints in the edition.
Here’s a break down of the steps.
Part 1
Before anything I cut out all the Kitakata (natural color) tissue that will be used for printing the chine collé (more on this in Part 6 below). In this clip I’m trimming down one sheet. I eventually stacked multiple layers of tissue in order to trim down a few at a time … given there are 26+. I always stack the tissue orienting it with top and face marked with a scrap of paper.
Part 2
Pulling the ink out and warming it up a bit. This isn’t really all that much needed in the summer in Texas. As mentioned above we used a mixture of Charbonnel Soft Black and 55981. I mix up a bigger batch of ink and then wrap it up in aluminum foil at the end of the printing session to save for the next day of printing. This edition took me roughly a day and a half over the span of 3 printing sessions.
Part 3
Inking the plate. I use a cheapo auto bondo blade to pickup and wipe the ink across the plate to get a good even coating. I then gently scrape off the excess. These plates are pretty darn durable so I don’t worry too much about scratching them (I think the printmaking gods just heard me so I’ll now invariably scratch a plate). Then I first use a nice and ink filled tarlatan, progressing to a bit of a cleaner portion of tarlatan. Then onto fine hollytex or newsprint for “finish” wiping. This is a step where you just have to learn and get used to when to stop wiping relevant to a particular plate. I learned that the bottom right corner of the plate was prone to “overwiping” (muddying up the shadows) and that I needed to wipe a good bit in the upper left area to make sure I got some good highlights in that spotlight.

Part 4
Wiping/cleaning the edges of the plate. I like having a small 1/8” white border on plates. I like the imprint it shows. It does prove to be a bit of a PITA when it comes to cleaning the edges though. The edge of the polymer plate always ends up holding a lot of ink so I spend a good amount of time cleaning the white border and the ink-filled edges.
Part 5
Getting the plate onto the press bed. I printed this plate on a 30” Charles Brand Etching Press that’s at Flatbed in the community shop. I love this press. When you versed in printmaking you learn to love certain presses. My favorite at Flatbed has always been the original 24” American French Tool that the owner/founder Katherine has had since Flatbed was founded. This new (to the community shop) Charles Brand is slowly becoming my new favorite. You’ll notice that I created a mask/guide that I put under the plexiglass that is on the press bed. This assists with knowing exactly where to place the plate and then the paper to try and ensure that each print looks as close to identical as the next.
Sidenote: ALWAYS clean the press bed before pulling a print. I guarantee you that there will be ink on the press bed that gets printed on the paper with the most beautiful print that you pull. When in doubt, clean the press bed with some alcohol and a rag.
Part 6
Now we’re onto the Chine Collé. I cut down the tissue in Part 1. Here I’m misting the tissue with a japanese plant mister I got on Amazon. I then use a pastry duster to dust the plate with Japanese Wheat Paste from Talasonline.com. You can also use Methyl Cellulose. Depending on the size of the tissue I’ll sometimes mist the tissue again right before I move it over to the pressbed to lay it on the polymer plate.
Part 7
After 6 I gently pick up the tissue and bring it over to the pressbed and align it as precisely as I can onto the inked up plate.
Part 8
Pulling a sheet of paper. I use a method called a wetpack for paper. Intaglio printmaking (ink goes in the valleys of the plate) that’s used for photogravure printing needs to have paper that is slightly damp in order for the paper to pull ink out of the plate when it runs through the press. Intaglio printing uses an IMMENSE amount of pressure on the etching press, hence the imprint on the paper after printing.
Back to the wetpack. A few days before printing I lay out a big sheet of plastic sheeting. I have a stack of dry paper torn down to size (15x22 in this case) and a tray of water where I wet a piece and stack it with a dry sheet onto the plastic alternating between wet and dry to make a big stack of paper. Then I wrap it up in plastic to seal it up and then add a board and some weights to compress it down for a few days. Then when I’m ready to print all the paper has an even moisture content distributed throughout. I then just unwrap it and pull a sheet out. I’ll hit it with a cheap brayer between some sheets of newsprint to get the moisture content to the optimal level. This is a “feeling” thing and I just sorta know it when I feel it … or I don’t and things go to complete S%*T and I have to quit for the day and try again later.
The paper last a good while in the wetpack … but eventually it’ll start to mold. If I don’t use the paper within 2wks I’ll pull out the sheets and hang them to dry until I can print again.
Part 9
Laying that sheet onto the pressbed and inked polymer plate. This part is delicate, especially in the case of printing a chine collé. Any movement when you lay that sheet down runs the risk of moving the kitakata tissue. I usually lay down the bottom edge and gently roll it down in a smooth motion.
Part 10
Pulling the print. This is the magical moment and always amazing even after making hundred and hundreds of prints. I almost always run the print through the press twice. Lots of people would likely call this overkill or unneccesary. I get a great print more often running twice than I do running once. Plus my press at home is small so it makes a great difference there … and I’m a creature of habit.
That’s it. Print made. Rinse and repeat (30 times in this case) the whole time listening to a Willie Nelson’s Redheaded Stranger and/or a playlist of your choice.